Queries Interface
The Netuno Query tool is a powerful resource that allows direct interaction with the application's database through SQL (Structured Query Language).
This functionality is essential for testing business logic, validating stored information, and establishing the basis for complex reports or interface components. Netuno currently supports three database management systems: PostgreSQL, H2 Database, and MySQL.
1 - Query Section
In "Build" mode, in the side menu, access the "Management" area and click on the "Query" section.
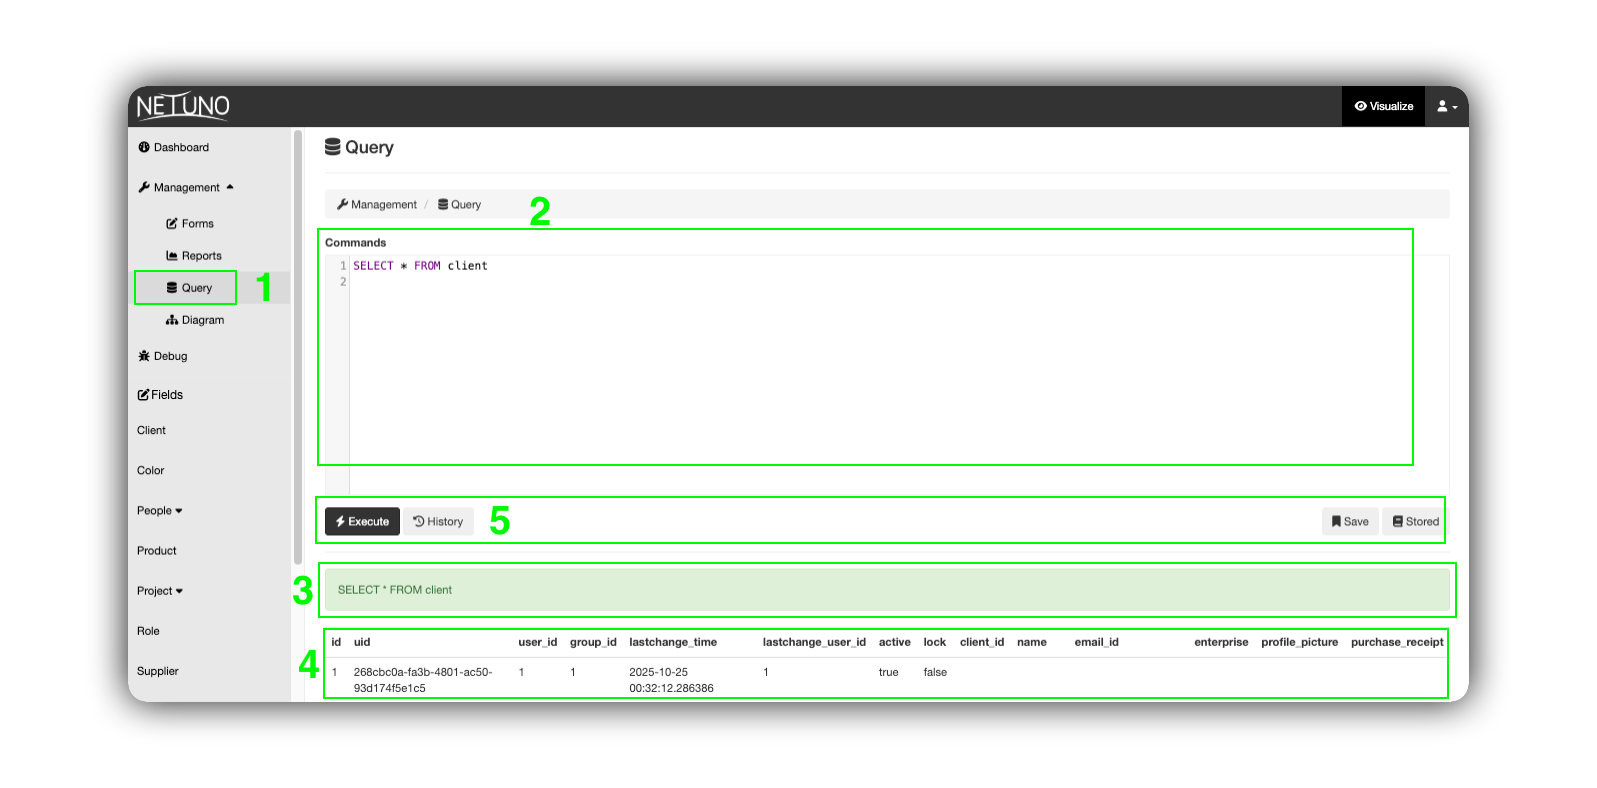
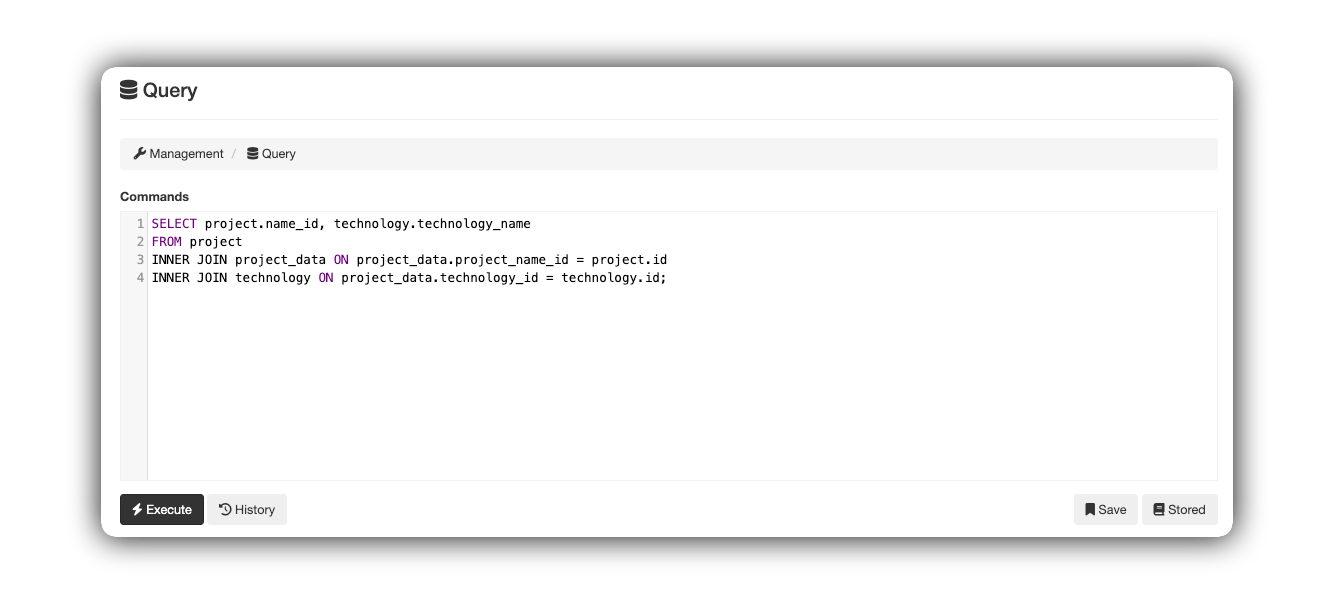
2 - Command Area
This area is the environment for direct interaction with the project's database. Here, it is possible to execute commands to query, search, and analyze data accurately and instantly.
Ensure that the syntax used is compatible with the database configured in your Netuno environment.
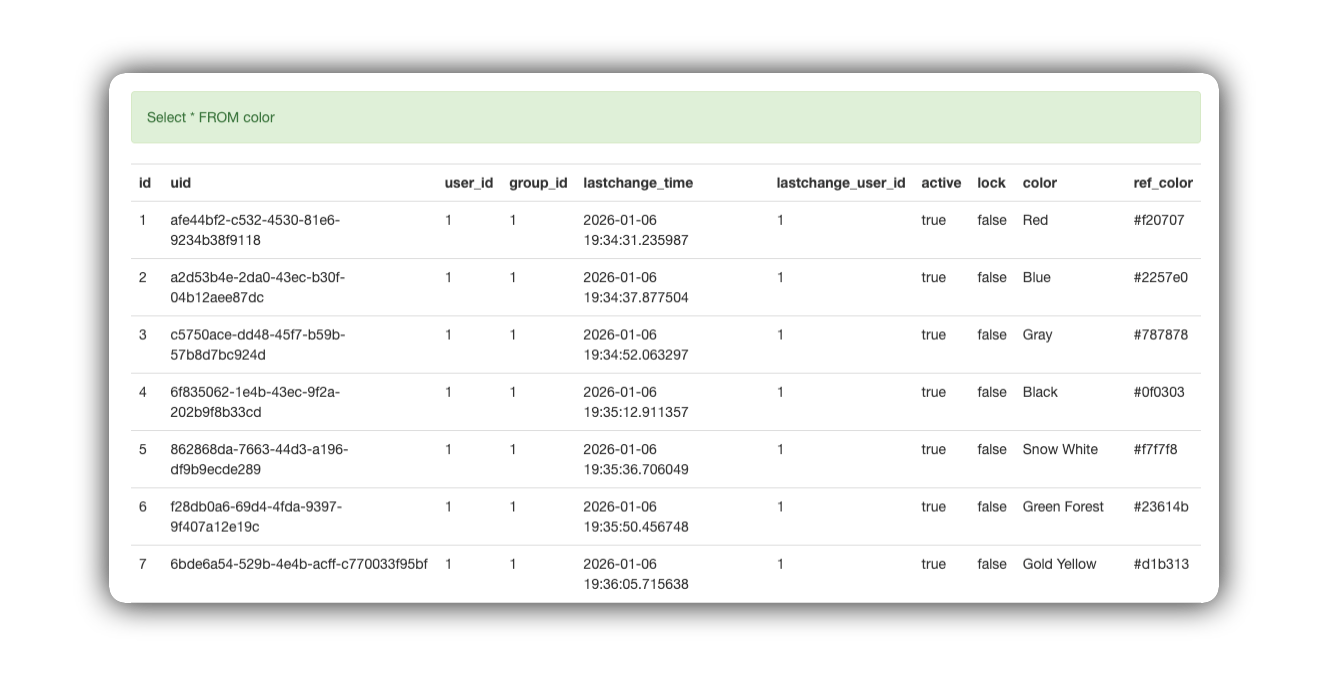
3 - Validation Area
The validation area provides instant feedback on the syntax and execution of your code.
- Success (Green): When the query is executed without syntax or structure errors, the message is displayed with a green background. This indicates that the data has been processed and is ready for viewing.

- Failure or Error (Red): If there is any impediment to execution (such as a syntax error, incorrect column name, or lack of permission), the message will be displayed with a red background. In addition to the color, the system will display the technical error log to assist in diagnosis.

4 - Results Area
This is where the information requested from the database is presented in a structured way. It allows you to view the contents of the tables and confirm that your query logic is returning the expected records.
5 - Action Buttons
This section details the tools available to execute, save, and manage your SQL scripts, optimizing workflow and the reuse of complex queries.
It allows not only the execution of commands in real time, but also intelligent productivity management through historical records and saved script libraries.

5.1 Button - Execute
-
Function: Sends the script present in the "Commands" area to be processed by the database.
-
Feedback: After execution, the system displays a success message (in green) and automatically populates the "Results Area" with the requested data.
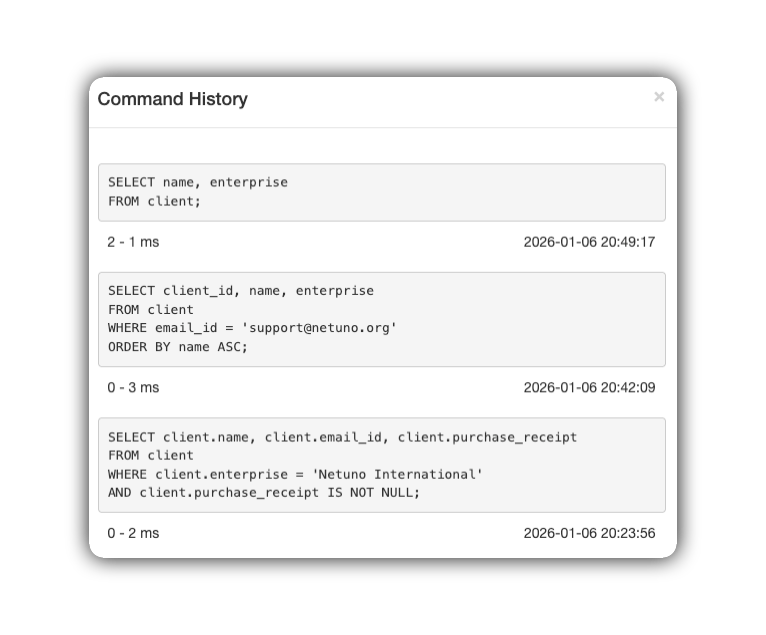
5.2 Button - History
-
Function: Records recently executed queries, displaying the execution time (in milliseconds) and the "date/time" of each action.
-
Quick Retrieval: By clicking on any record in the history list, the corresponding script is inserted back into the "Commands" area to be executed or edited.
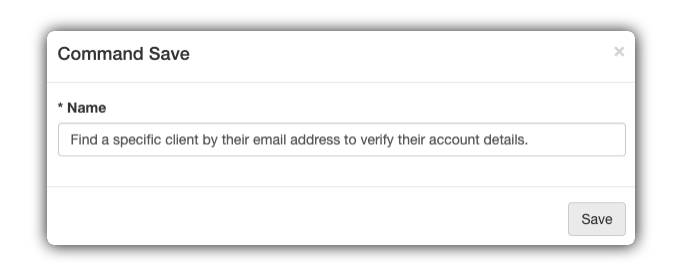
5.3 Button - Save
Function: Allows you to store useful scripts and transform them into permanent templates. This is useful for complex queries that need to be executed frequently.
Step-by-Step to Save:
-
With the script ready in the editor, click Save.
-
In the "Save Command" modal window, enter a clear "Name" to identify the query's function (e.g., "Filter products by price").
-
Click the Save button within the modal to confirm the saving.
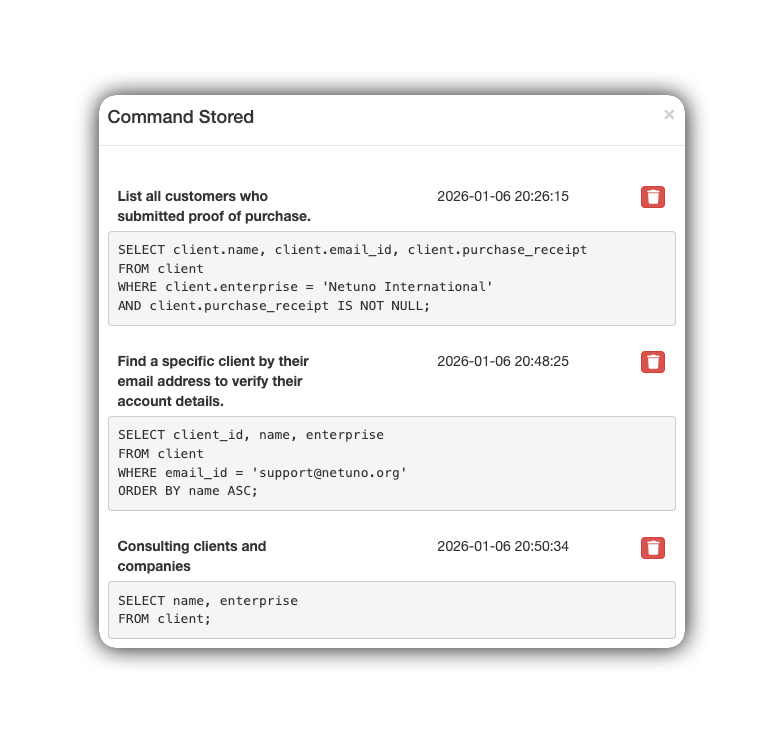
5.4 Button - Register
Function: Allows you to list all previously saved scripts.
-
Load script: Click on the desired script to add it to the "Commands" area.
-
Delete: Use the trash can icon next to each entry to permanently remove it after confirmation.