Forms
How to Create Forms
Form management is the area where you can create and manage your application's data structures. Each form you create here becomes an interface in the back office for entering, editing, and viewing data, as well as corresponding to a table in the database.
It is divided into two essential and mandatory steps, accompanied by a brief approach to form grouping and diagram mode.
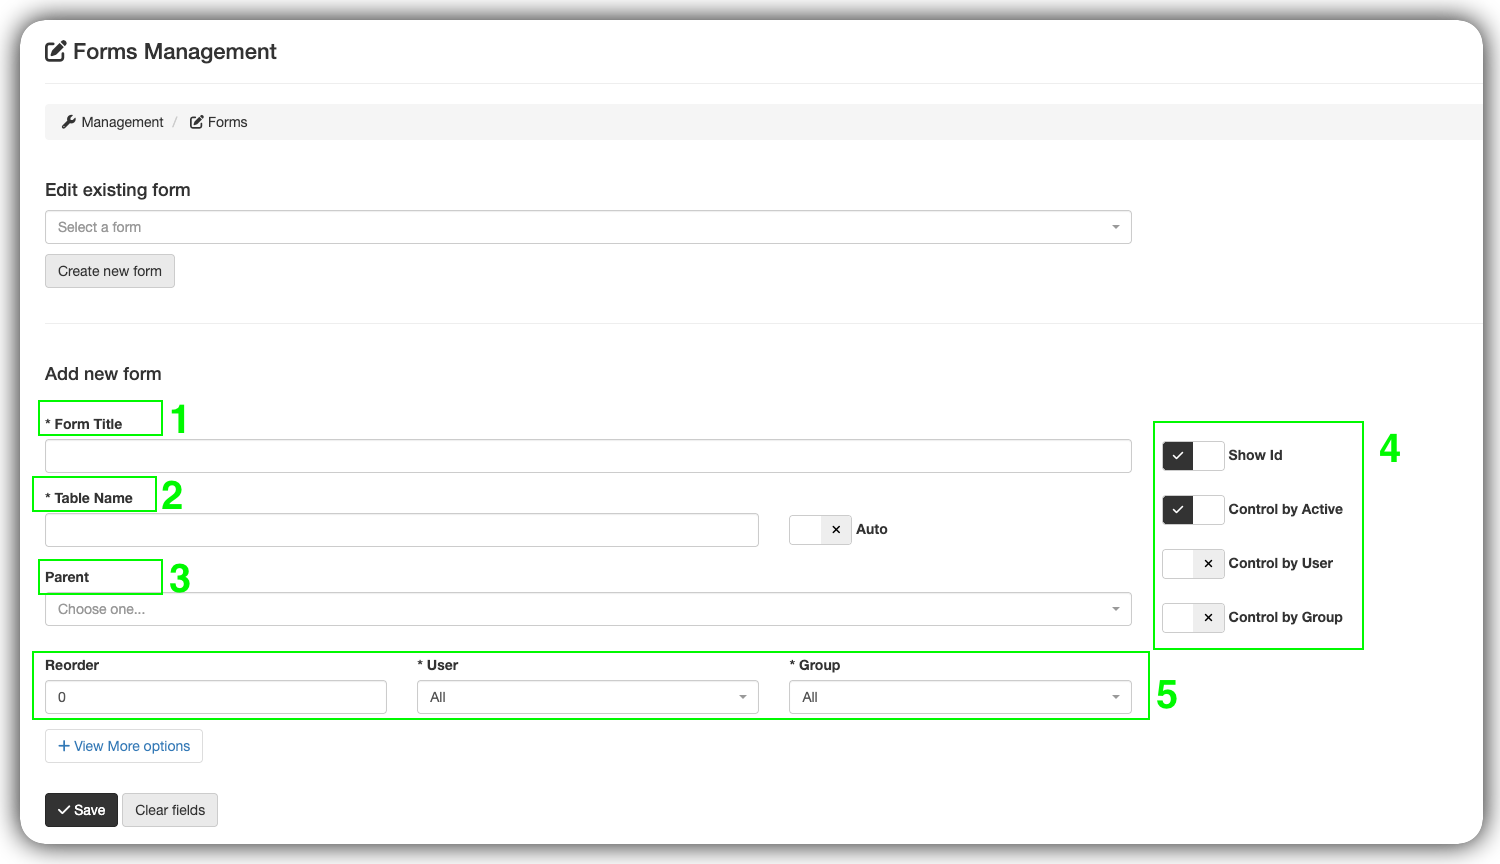
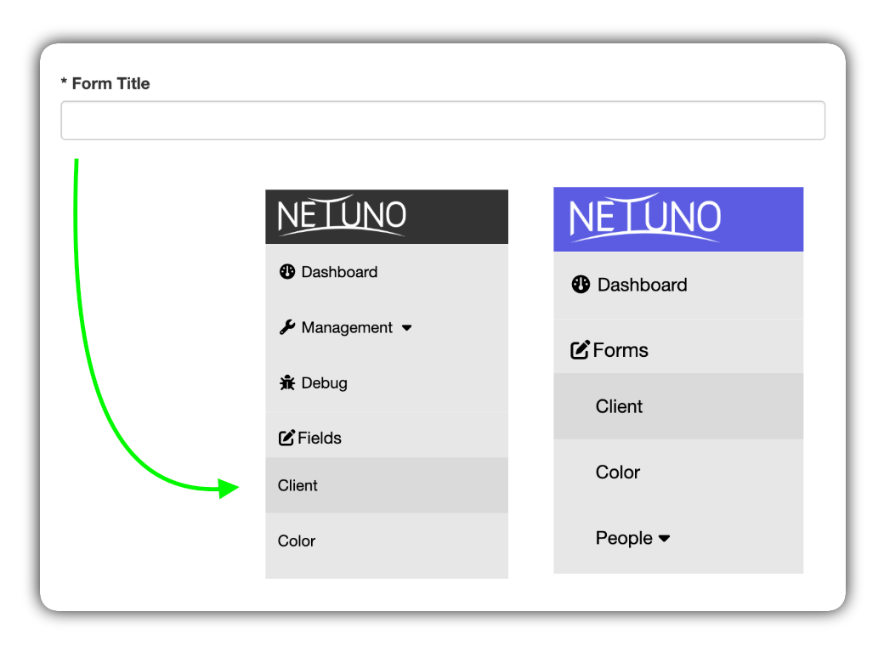
1 - Form Title
This is the name of your form, so enter a clear and intuitive name.
It will be displayed in the back office sidebar menu in the following sections: Forms (in View mode) and Manage Fields (in Build mode).
2 - Table Name
This is the technical name that will be used to create the corresponding table in the database. This name is used internally by the system and by developers.
How to fill it out:
-
Manual: Enter a unique name in the singular, with lowercase letters and without spaces or special characters (use the
snake_caseformat, for example: cadastro_cliente). -
Automatic: Check the Auto box next to the field. The system will automatically generate a technical name based on the Form Title. This is the recommended practice to maintain consistency.

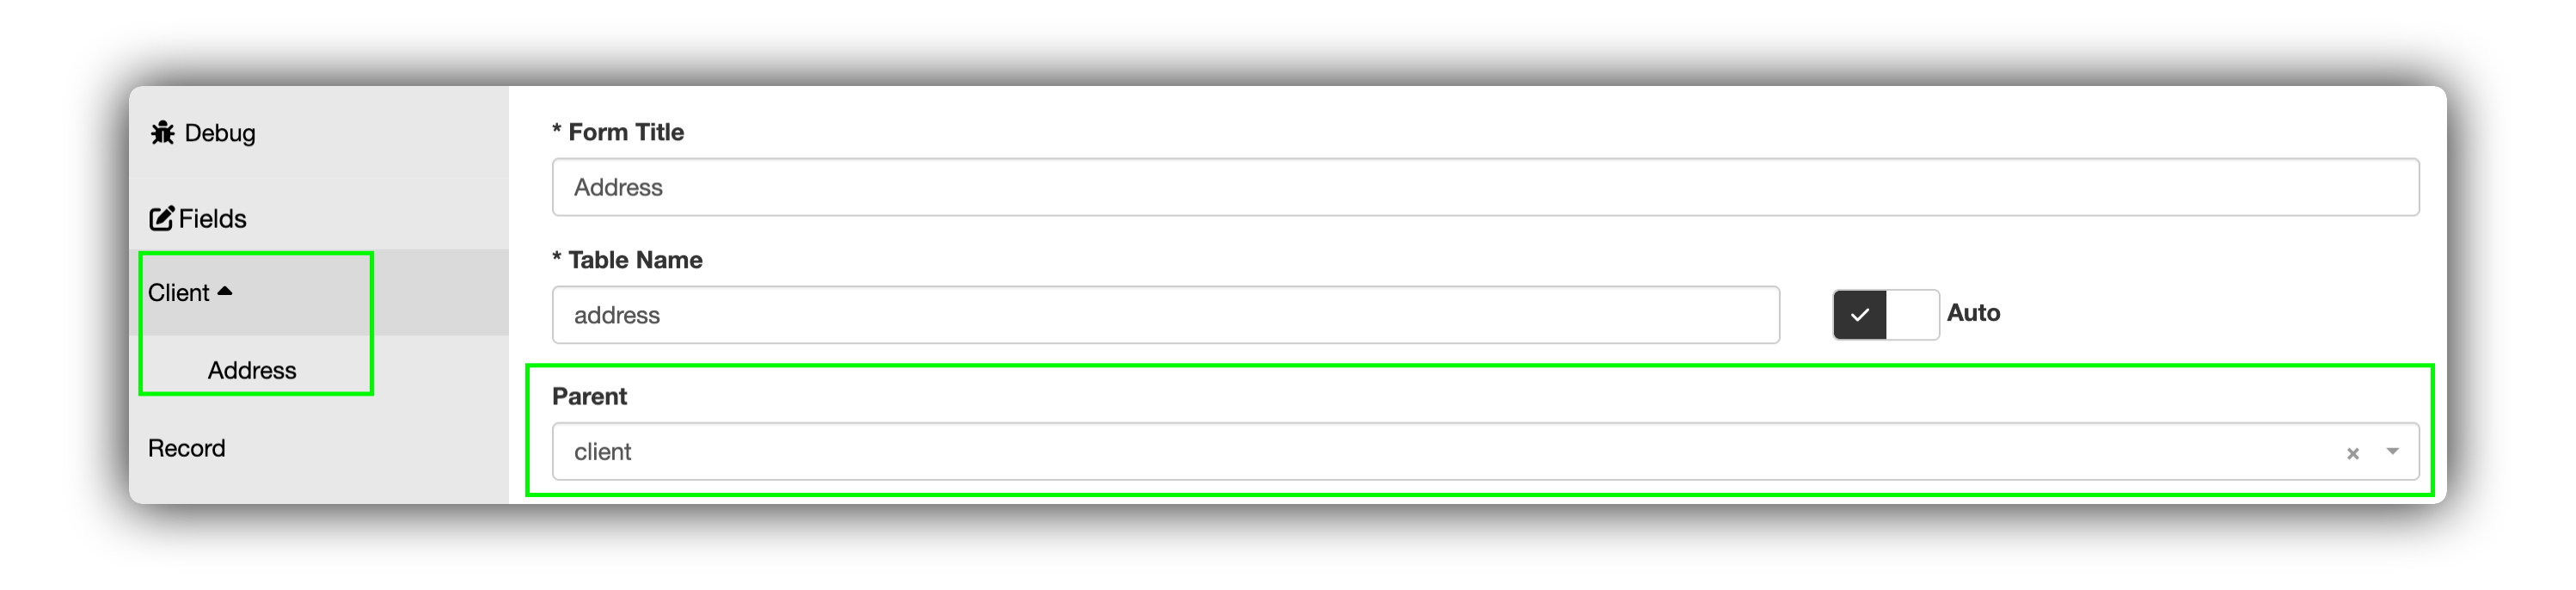
3 - Form Grouping (Parent)
This field allows you to create a hierarchy between forms. By selecting a "Parent," you are defining the current form as a sub-item of the selected form. It will be displayed in the sidebar menu in the following sections: "Forms" (in View mode) and "Manage Fields" (in Build mode) of the associated main form.
How to fill in:
-
Leave blank if this is a main form (such as "Client").
-
Select an existing form from the list if you want to create a dependency relationship. For example, an "Addresses" form could have "Client" as its parent.
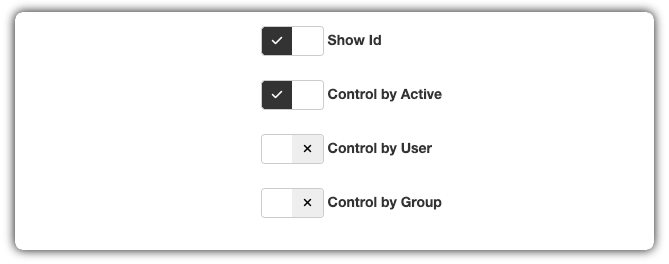
4 - Control Options
These checkboxes activate specific functionalities for the form.
-
Show ID: Check this option if you want the unique identification (ID) field of each record to be visible in the form's data listing.
-
Active Control: Activates a status control (Active/Inactive) for each record. This allows you to deactivate an item without having to delete it from the database.
-
User Control: Causes each record created in the form to be associated with the user who created it. This is useful for tracking who performed each registration.
-
Group Control: Associates each record with a user group. This option is commonly used to manage data access permissions based on the groups registered in the system.
5 - Sorting Settings and Associated Users
These fields define default values for new records and the display order.
-
Reorder: Set a number for the order in which this form will appear in the sidebar menu. Smaller numbers (such as 0, 1, 2) appear first.
-
User: Select a default user to be associated with new records if "User Control" is enabled. "General" means there is no specific user.
-
Group: Select a default group to be associated with new records if "Group Control" is enabled. "General" means there is no specific group.

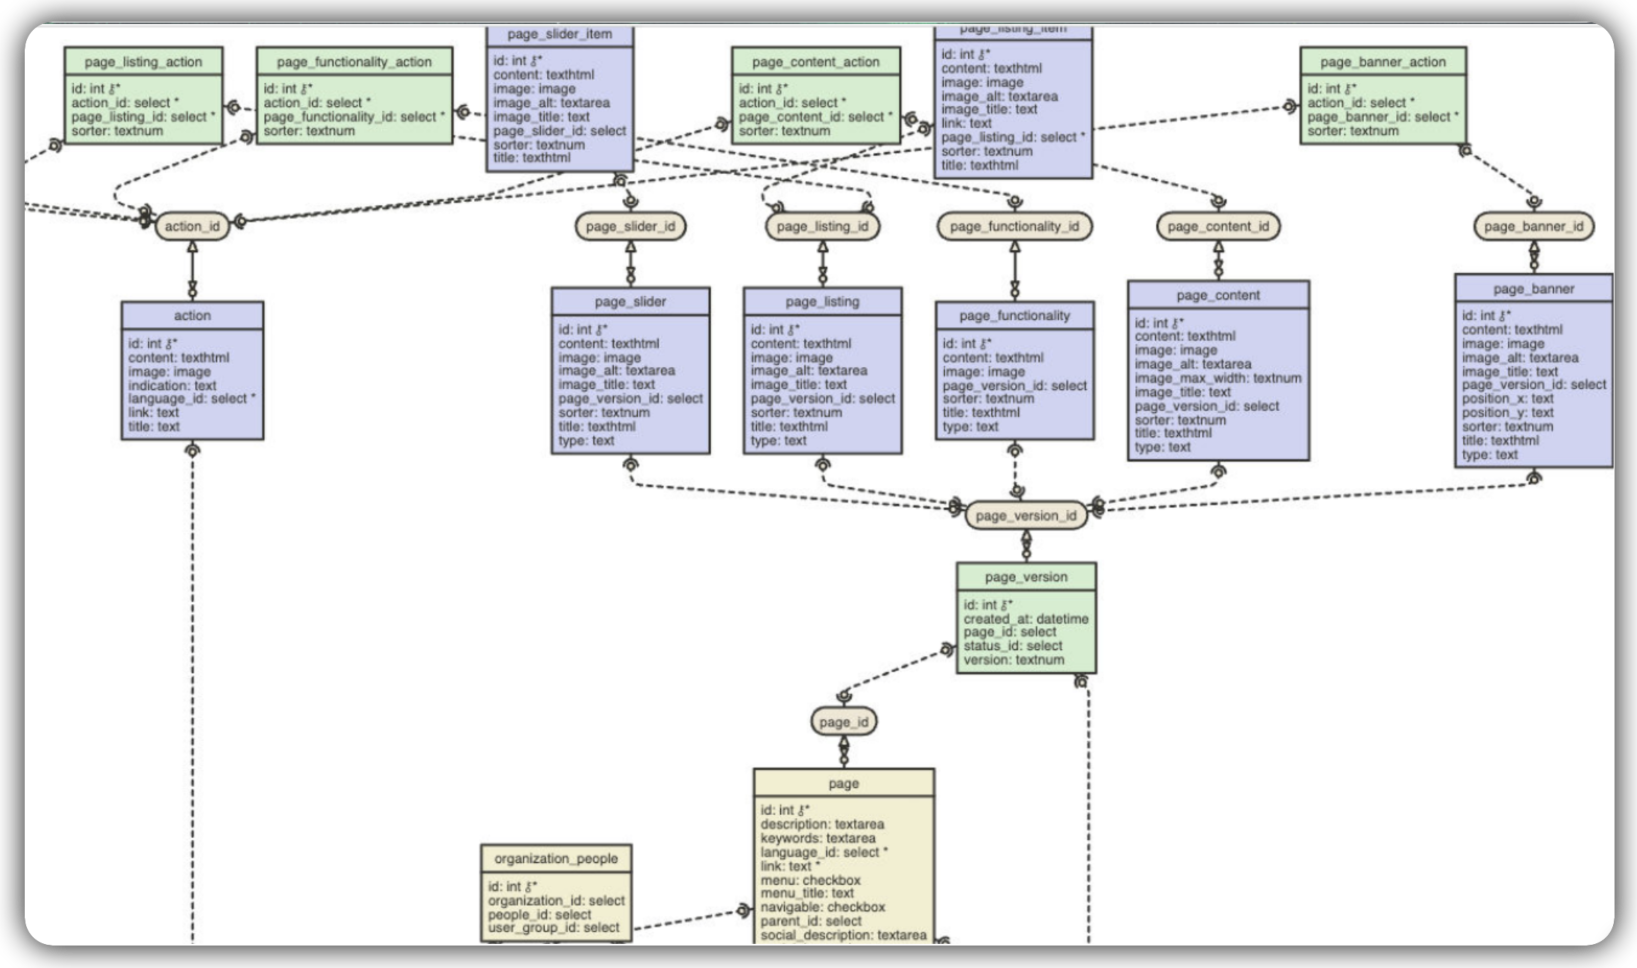
6 - Diagram Mode
The Diagram screen offers a graphical visualization of your application's entire data structure. Known as an Entity-Relationship Diagram (ERD), it displays all forms (which represent tables in the database), their respective fields, and the connections between them.
This tool is fundamental for quickly understanding how your application's information is organized and connected, facilitating analysis and development.
Try creating multiple forms and fields and visualize them in diagram mode!
Next Step
Save the form and move on to the next step: creating fields!
See here how to start creating fields.