Fields
Fields are the fundamental components and "building blocks" of a form in Netuno. They represent the user interaction interface and define how data will be structured and stored.
In practice, each created field corresponds to a column in the database table, determining the type of information the system can process—such as text, numbers, dates, selections, and files.
Creating and Editing Fields
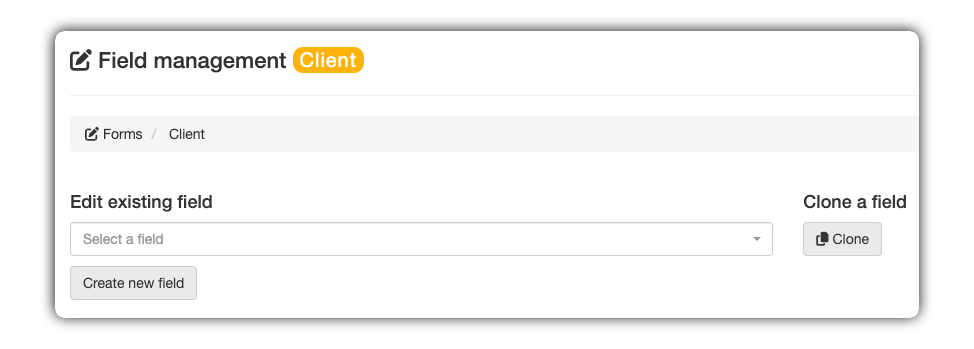
These buttons allow you to manage the overall editing status:
-
Edit existing field: Dropdown menu to select an already created field and modify its settings.
-
Create new field: Clears all fields in the form to start configuring a new element from scratch.
-
Clone field: Duplicates the settings of the selected field to speed up the creation of similar items.

1 - Field Title
The Field Title (technically known as Label) is the visual instruction that guides the user on what information should be entered into a form. It functions as an identifying label, ensuring that data entry is intuitive and correct.
At this stage, the title has a dual purpose in the platform:
- In Field Management (Build): It serves to identify the field within its list of elements during application development.
- In the User Interface (View): This is the text that appears positioned just above or next to the input field, indicating to the end user what they should type in the form.
2 - Column Name
Unlike the title, the Column Name is the internal and unique identifier of the field, used directly in the database and in programming logic. It is through this name that the system locates the information in the database.
Automatic Formatting (Auto Switch):
Netuno facilitates this process by automatically filling in the name based on the "Field Title". The standard used is snake_case.
Writing Rules: If you choose to fill in manually (disabling "Auto"), keep the name in the singular, use only lowercase letters, and avoid spaces or special characters.
3 - Data Types
The definition of the Data Type determines the nature of the information collected, directly impacting the appearance of the field to the user and how the data is stored in the system.

3.1 Text Fields
These fields are intended for inserting text in different formats. They vary according to the data volume requirement.
| Type | What does it do? | Practical Use Example |
|---|---|---|
| text | Creates a simple input for a single line. | Names, article titles, neighborhoods, etc. |
| textarea | Creates a larger text area input, for multiple lines. | Product descriptions, comments, observations. |
| Creates a formatted text input to receive an email. | Contact email registration, user login. | |
| texthtml | Creates a rich text editor that allows formatting with HTML. | Content creation for a blog, marketing emails, website pages. |
| textmd | Creates a text editor that supports the Markdown markup language. | Ideal for technical documentation, blog posts for developers. |
3.2 Numeric Fields
Used to collect information that is strictly numeric.
| Type | What does it do? | Example of Use |
|---|---|---|
| textnum | Creates an input for entering integers. | Quantity in stock, a person's age, number of vacancies. |
| textfloat | Creates an input for entering numbers with decimal places. | Product prices (example: 99.90), weight (example: 75.5), height (example: 1.82). |
3.3 Selection Fields
Used when the user must choose between predefined options.
| Type | What does it do? | Practical Use Example |
|---|---|---|
| select | Creates a list of options where the user can choose only one. | Select a state (UF), marital status, product category. |
| multiselect | Creates a list of options where the user can choose several. | Select interests (sports, technology), pizza ingredients. |
| checkbox | Displays a single checkbox (enable/disable). | "I accept the terms of use", "Remember my password". |
| color | Displays a visual color picker. | Choose the color of a product, customize the color of an event. |
3.4 Date and Time Fields
Specialized for inserting temporal information.
| Type | What does it do? | Practical Use Example |
|---|---|---|
| date | Displays a calendar for the user to select a date (day, month, year). | Date of birth, scheduling date. |
| datetime | Allows the selection of a date and time. | Start of an event, date and time of a publication. |
| time | Allows the selection of a time (hours and minutes). | Operating hours, alarm time. |
3.5 File and Media Fields
Used to send files and images to your application.
| Type | What does it do? | Practical Use Example |
|---|---|---|
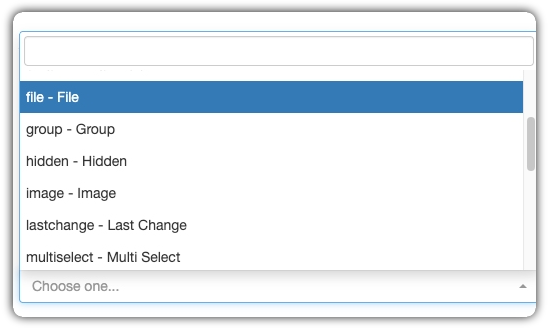
| file | Creates a field for uploading any file (PDF, DOCX, ZIP). | Attach a resume, send proof of payment. |
| image | A field optimized for uploading images (JPG, PNG, GIF). | User profile picture, product image. |
3.6 Technical and Special Fields
These fields have automatic behaviors or serve specific system purposes.
| Type | What does it do? | Practical Use Example |
|---|---|---|
| hidden | The field is invisible to the user, but stores a value. | Stores an ID from another page, a tracking code. |
| uid | Automatically generates a Universally Unique Identifier. | Primary key of a record, unique code of an order. |
| user | Associates the record with the user who created or modified it. | Identify the author of a blog post, the salesperson who registered a customer. |
| lastchange | Automatically stores the date and time of the last modification of the record. | Audit, to know when data was last changed. |
| group | Used to visually group other fields in the form. | Create sections like "Personal Data" and "Address" to organize long forms. |
4 - Behavior and Layout Settings
This area is the "control panel" for your field, defining business rules and access permissions.

4.1 Data Integrity Rules
These options ensure the quality and consistency of the information.
| Configuration | What does it do? | Practical Use Example |
|---|---|---|
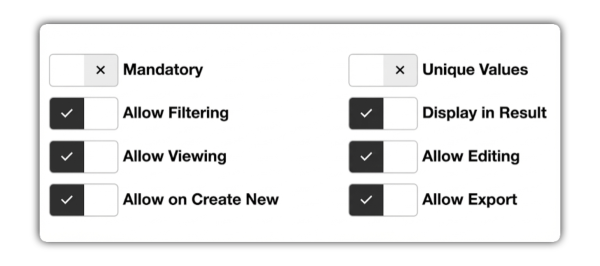
| Unique Values (Primary Key) | Transforms the field into the main and unique identifier, preventing duplicate values. | Use for "CPF" (Brazilian Taxpayer ID), ensuring that no two clients have the same number. |
| Required (Not Null) | Makes filling in the field mandatory. | Apply to essential fields such as "Name" and "Email". |
4.2 Permission and Visibility Control
Defines where and how users interact with the data in this field.
| Configuration | What does it do? | Practical Use Example |
|---|---|---|
| Display in Results | Defines whether the column will appear in the main data listing. | Uncheck for "Internal Notes" to keep the listing clean. |
| Allow Filtering | Adds a search box for this column to the listing. | Enable in "Order Status" for easy location. |
| Allow View | Controls whether the content will be displayed in view mode. | Leave checked in most cases. |
| Allow Editing | Allows the content to be changed when a record is being edited. | Uncheck for fields that should not be changed, such as "Registration Date". |
| Allow on Create New | Defines whether the field should appear in the creation form. | Uncheck for "feedback" fields, which should only be filled in after creation. |
| Allow Export | Includes the data from this field when exporting the listing (Excel, CSV). | Uncheck internal data that is not relevant for external reports. |
5 - Visual Organization of the Form
Defines the positioning of the fields in the layout.
| Configuration | What does it do? | Practical Use Example |
|---|---|---|
| Row | Defines the vertical position of the field in the form. | Place "Full Name" on Row: 1 and "Address" on Row: 2. |
| Column | Defines the horizontal position, allowing multiple fields side-by-side. | To have "City" and "State" together, use Row: 3, Column: 1 (City) and Column: 2 (State). |
6 - View More Options
For more customized control, click the "+ View More Options" button.
6.1 Description Field

| Configuration | What does it do? | Practical Use Example |
|---|---|---|
| Description | Adds help text or instructions that appear below the field. | In "Password", use the description to inform the rules: "The password must be at least 8 characters long...". |
6.2 Field Sizing

Fine control over the field size.
| Configuration | What does it do? | Practical Use Example |
|---|---|---|
| Width | Defines the width of the component (based on a 12-column grid). | "CPF" (Width: 6) and "Date of Birth" (Width: 6) on the same line. |
| Height | Defines the height of the component in pixels (px). | In textarea "Observations", set Height "120" for a larger area. |
| Cell Width (px) | Defines a fixed width in pixels for the cell. | Use to align fields with specific widths, such as "UF" (Width: 80). |
| Cell Height (px) | Defines a fixed height in pixels for the cell. | Increase the height of an image field to create a "drag and drop" area. |
| Rowspan | Allows the cell to expand vertically across multiple lines. | A "Description" textarea that occupies 3 lines of height next to smaller fields. |
| Colspan | Allows the cell to expand horizontally across multiple columns. | A "Full Address" field (Colspan: 2) above "City" and "State". |
6.3 Data Validation and Rules
Establish limits for the entered values.
| Configuration | What does it do? | Practical Use Example |
|---|---|---|
| Max | Maximum value (numeric) or maximum number of characters (text). | In "Grade (0 to 10)", set Max to "10". In "Nickname", Max "20". |
| Min | Minimum value (numeric) or minimum number of characters (text). | In "Quantity", set Min to "1". In "Justification", Min "30". |
6.4 Access Control

Define groups and users who can view and edit the field.
| Configuration | What does it do? | Practical Use Example |
|---|---|---|
| User View and Group View | Restricts the viewing of the field only to the specified users or groups. | "Salesperson Commission" has a Group View of "Managers". |
| User Editing and Group Editing | Allows only the specified users or groups to edit the field (others see it as "read-only"). | "Order Status" has a Group Editing of "Logistics". |