Relationships Between Forms
How to Create Relationships Between Forms
Creating relationships between forms is an essential feature for intelligently organizing information. By connecting forms, you eliminate the need to duplicate data and ensure that your application is cohesive, scalable, and easy to maintain.
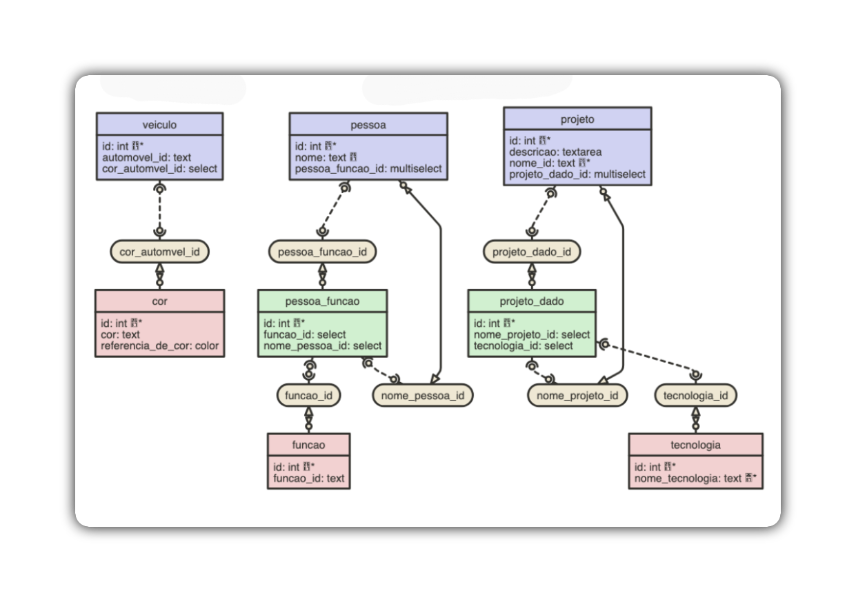
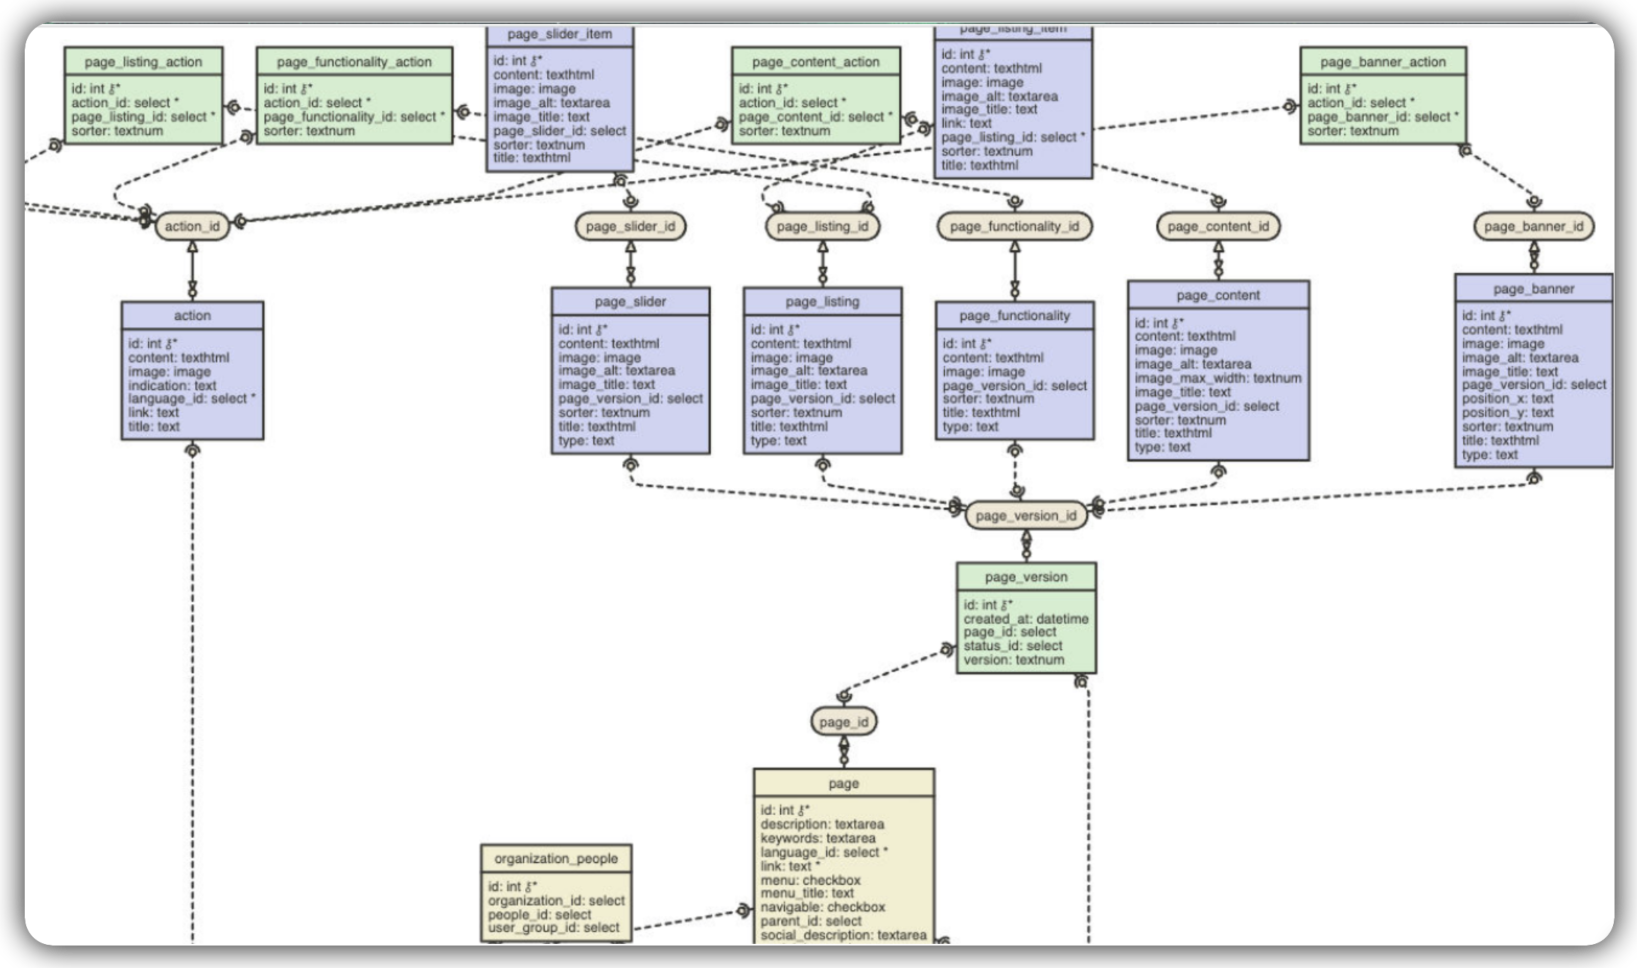
One of the great advantages of Netuno is its ability to automatically generate the data model diagram.
Relationships define how data from different tables interact with each other. This connection is directly reflected in the user interface (UI), allowing fields in one form to automatically retrieve information from another.
Simple Diagram: Ideal for validating the initial logic of small modules.
Complex Diagram: Demonstrates the robustness of the tool in large-scale applications, mapping multiple dependencies and data flows.
Creating a Relational Field of the Select Type
The Select field creates a relationship between two forms. It allows you to choose a value from a dropdown list (drop-down list), instead of typing it manually. This list is populated with data that already exists in another form.
We will use the Vehicles and Color forms as examples.
When to use it? Use the select when you have a "Many-to-One" (N-1) relationship.
Example: Many Vehicles can have a Color. By typing "Blue" each time, you select "Blue" from a list of already registered colors.
-
Destination Form: Vehicle (where we will create the select field).
-
Source Form: Color (where the core list data comes from).
Requirements
Before starting, make sure that:
-
Both forms (Vehicle and Color) are already created in Netuno. For more details, see our guide on Creating Forms.
-
The source form (Color) already has some records registered. (Ex: "Blue", "Red", "Silver"). For more details, see our guide on Creating Fields.
Create and Configure the Select
Add the select field type to the Vehicle form so that it can "pull" the data from the Color form.
1 - Access the Destination Form
- In the Backoffice, go to field management and open the Vehicle form.
2 - Create the New Field
- Click on "Create new field".
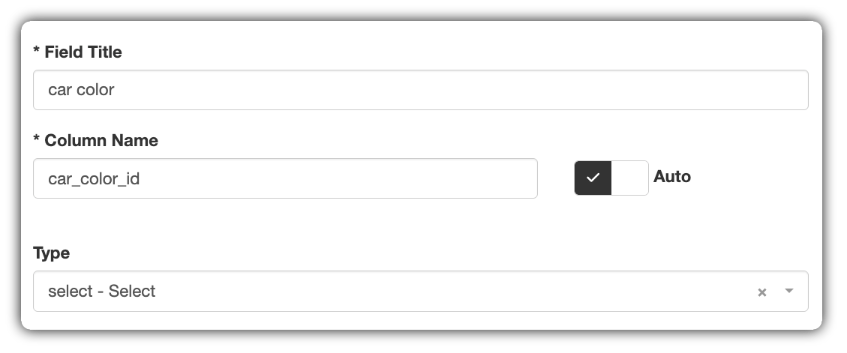
3 - Define the Title and Column Name
-
Field Title: Give it a user-friendly name that will appear to the user. Example: Car Color.
-
Column Name: This is the technical name of the field in the database.
Best Practice: When creating a relational field, always use the suffix _id in the Column Name. This makes it clear that this column does not store the text "Blue", but rather the reference ID for the "Blue" record in the Color form. Example: car_color_id.
4 - Choose the Data Type
- In the Type field, select the option
select - selectfrom the list.
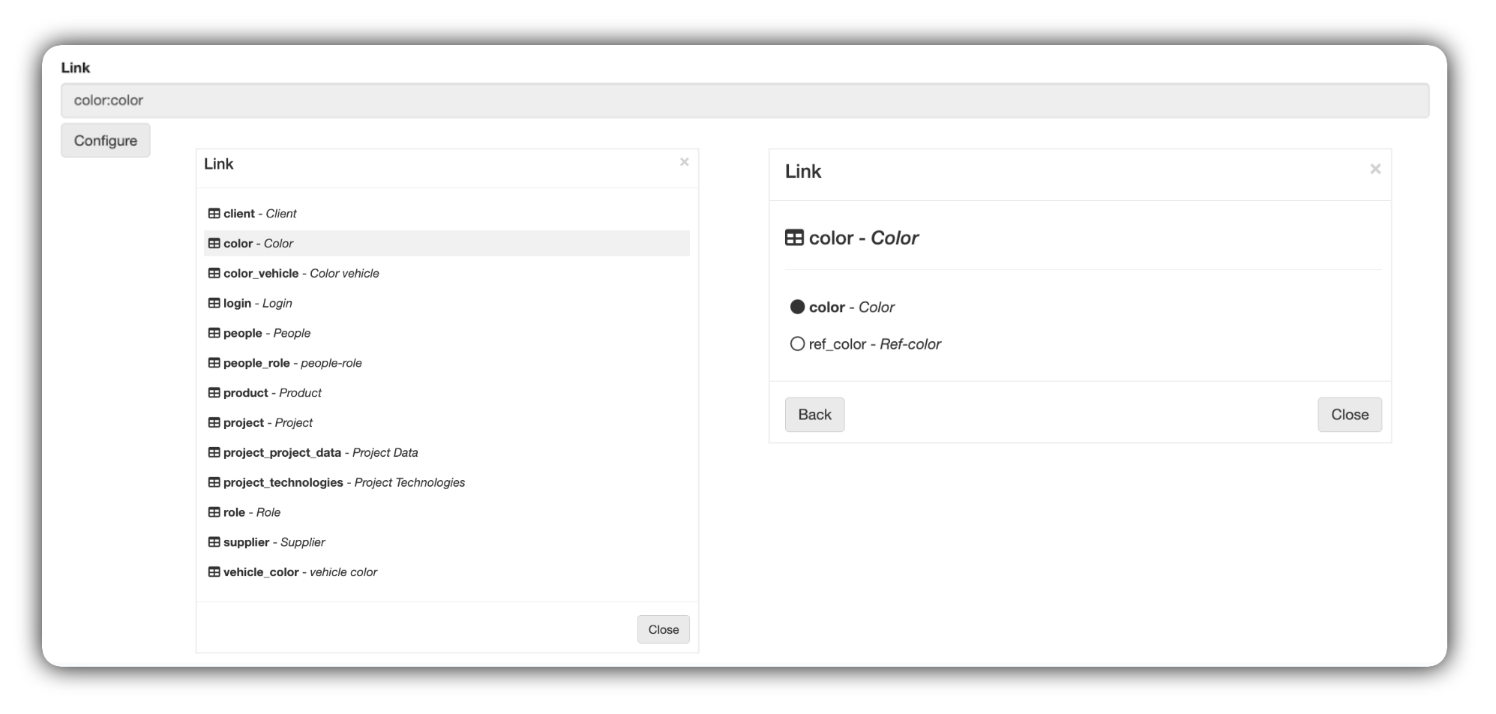
5 - Configure the Link (The Relationship)
-
When choosing
select, a new field called Link will be displayed. -
Click the Configure button.
-
A modal window will open, listing all your forms. This is the time to choose the Source form.
-
Select the form that contains the data you want to list. In our example, click on color - Color.
-
After selecting, click the Close button in the modal.
6 - Save Changes
- Click the Save button in the field management to apply all your settings.
Result
Done! Now in "view" mode, when you add or edit a record in the Vehicle form, the "Car Color" field will be a dropdown list showing all the colors registered in your Color form.
Creating a Multiselect relational field
The Multiselect field creates a "Many-to-Many" (N-M) relationship. It allows you to select multiple items from a list in a single field.
We will use the Person, Function, and Person-Function forms as examples.
When to use it? Use multiselect when a record can be linked to several others, and vice versa.
Example: Many People can have many Functions.
-
A person (example: "Ana") can have the roles "Admin" and "Manager".
-
The "Manager" role can be associated with multiple people (example: "Ana", "Bruno", and "Thiago").
For this to work, we need three forms:
-
Parent Form (Person): Where the
multiselectfield will be visible to the user. -
Source Form (Role): Where the list options come from (example: "Admin", "Manager").
-
Joint Form (Person-Role): A "bridge" form that stores the connections between Person and Role.
Requirements
Before starting, make sure that:
-
The form "Parent" (Person) is already created and has some records (example: "Ana", "Bruno", "Lucas").
-
The "Source" form (Function) is already created and has some records (example: "Admin", "Manager", "Consultant").
Create and Configure the Multiselect
The configuration is done in 4 steps:
Step 1: create the join form (Person-Function)
First, let's create the "bridge" form.
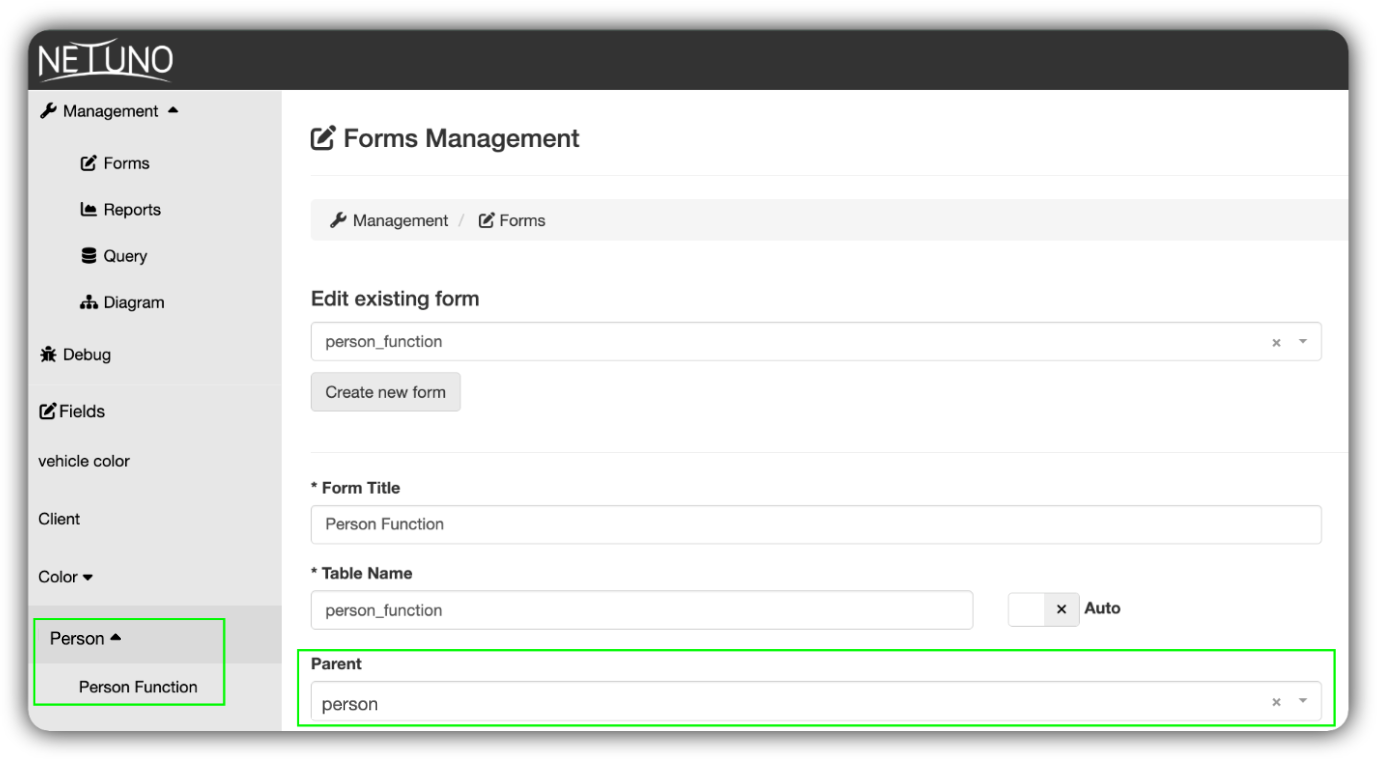
1 - Go to Management > Forms and click on "Create new form".
2 - Form title: Person-Function.
3 - Table name: person_function (or similar).
4 - Important: In the Parent field, select the main "Parent" form, which in this case is the Person. This transforms the Person-Function form into a sub-form.
5 - Click Save.
Step 2: configure the join form fields
Add the "bridge" fields to the Person-Function form.
1 - Access the Fields management of the Person-Function form you just created.
2 - Add two select fields: one that will point to Person and another to Function.
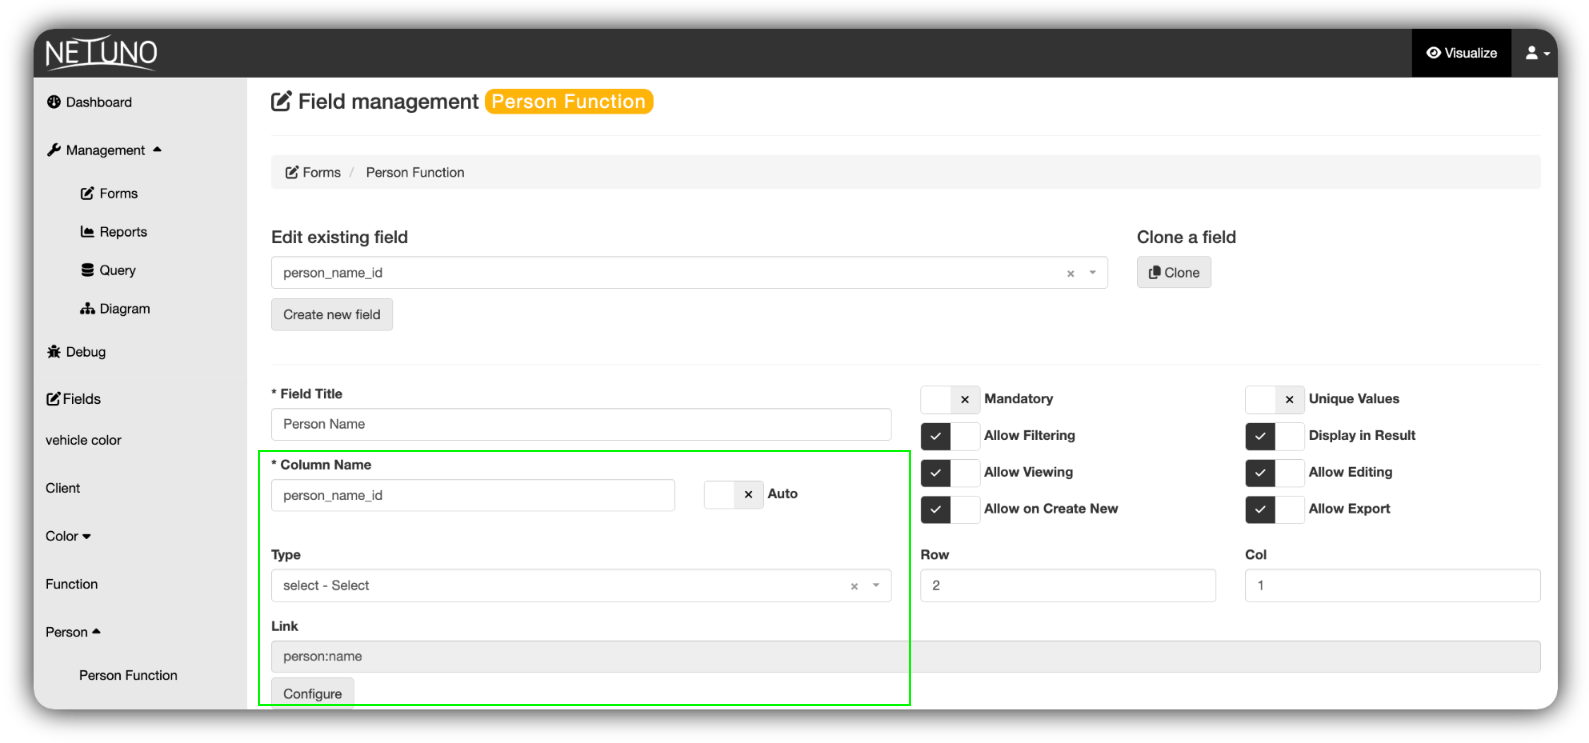
Field 1 (Link to Person):
-
Field Title: Person Name
-
Column Name:
person_name_id(following the _id convention) -
Type:
select - select -
Link: Click on Configure and select the main form field Person, example:
person:name. -
Click on Save.
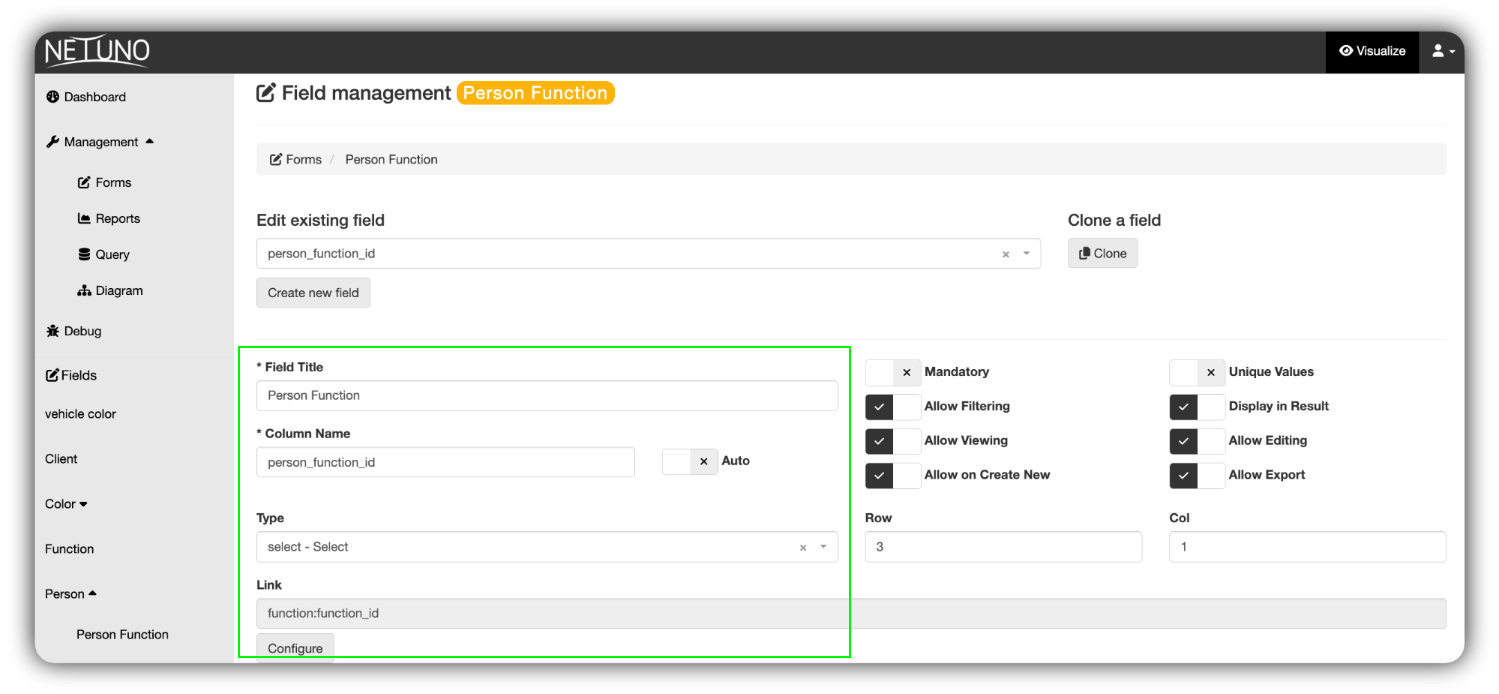
Field 2 (Link to Function):
-
Field Title: Person Function.
-
Column Name:
person_function_id. -
Type:
select - select. -
Link: Click on Configure and select the main form field Function, example:
function:function_id. -
Click on Save.
Step 3: create the multiselect field in the "Parent" Form
With the "bridge" (Person-Function) ready, we can return to the Person form to create the final field.
1 - Go to the Field Management of the Person form.
2 - Click on "Create new field".
3 - Field Title: Person Function.
4 - Column Name: person_function_id.
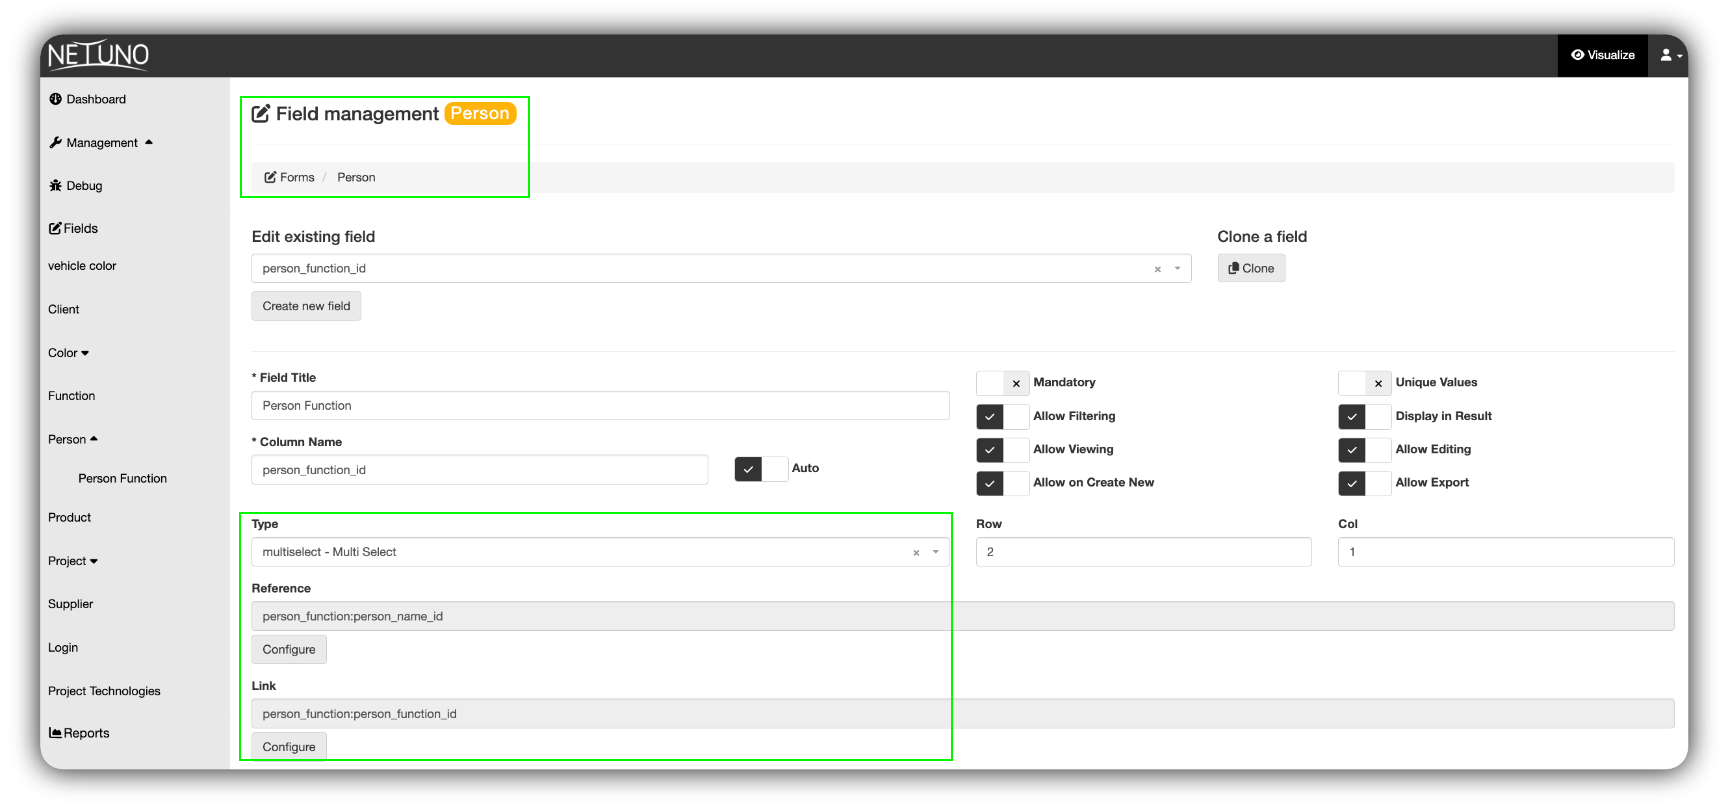
5 - Type: multiselect - multiselect.
Step 4: configure the multiselect field
When selecting the multiselect type, two new configuration fields will appear: Reference and Link.
1 - Reference (Where to save the relationship?)
-
This field tells Netuno: "Which field in the 'bridge' form refers back to me (Person)?"
-
Click Configure.
-
Select the join form (Person-Function) and the field you created in Step 2 (Field 1). Example:
person_function:person_name_id.
2 - Link (Where do the options come from?)
-
This field tells: "Which field in the 'bridge' form refers to the options (Function)?"
-
Click Configure.
-
Select the join form (Person-Function) and the field you created in Step 2 (Field 2). Example:
person_function:person_function_id.
3 - Save Changes
- Click the Save button in field management to apply all your settings.
Result
Done! Now in "preview" mode, when adding or editing a record in the Person form, the "Person Function" field will appear as a multi-select box. You can choose multiple functions from the list (which come from the Function form), and Netuno will automatically save these associations within the Person-Function form.
If you have any questions, please contact us through the community and other channels available at the bottom of this page.
Good development!