Access and Permissions
How to manage users, groups, and ensure application security.
Introduction
Security is one of the fundamental pillars of any application. Whether it's a simple internal application or a complex system with thousands of external users via API.
Netuno natively offers a robust Access and Permissions Control system, providing the necessary tools to manage security in a centralized and efficient way. It eliminates the need to develop these functionalities from scratch.
Among the main security mechanisms are:
- User and group management.
- Data permission control for data management.
- Detailed history of authentication attempts.
- Automatic IP blocking after consecutive failed access attempts.
- Integrated authentication with LDAP, Google, GitHub, Discord, etc.
- JWT authentication module for front-end.
- Among others...
User Management
This involves the administration of individual accounts that access the platform. Each user, service, or integration that needs to access the system must have a unique user record.
In the Netuno user management area, you have complete control over the lifecycle of these accounts:
- Creation: Registration of new team members or clients.
- Maintenance: Updating emails, changing passwords and registration data.
- Access Control: Quick account blocking (deactivation) without the need to delete historical data.
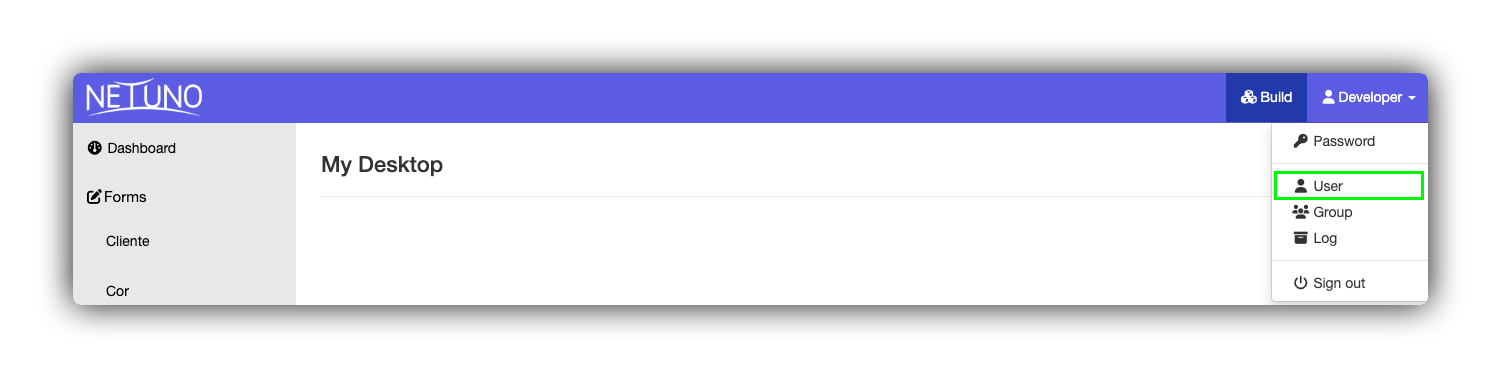
For detailed information on User Management, see the Interface Guide: Users and Groups
Group Management
Authorization rules are defined through Groups, which establish which menus, forms, services, and data each user is allowed to access or manipulate. Instead of configuring permissions individually, the ideal approach is to define the rules at the Group level and then associate users with it. This procedure ensures:
- Scalability: Ease of managing hundreds of users.
- Security: Reduced risk of accidentally granting unauthorized access.
- Organization: Clear separation between Administrators, Managers, Supervisors, and general users.
Netuno already includes native groups such as dev and admin, and provides complete autonomy to create custom groups to meet the business rules of your application.
For detailed information on Group Management, see the Interface Guide: Users and Groups
Data Permission Control
To ensure the functionality of a group or user permissions, it is crucial to establish what data they are authorized to handle. In Netuno, access control is detailed and applied directly to the Forms (tables) of your application.
The system uses a permissions matrix that allows you to define, for each functionality, whether a given group has the necessary authorization to:
- Read: View records only.
- Write: Insert and edit records in the database.
- Delete: Permanently remove records.
This flexibility ensures the protection of sensitive data, as each employee has restricted access only to the information essential for performing their tasks.
For information on how to configure data permissions, see the Interface Guide: Users and Groups
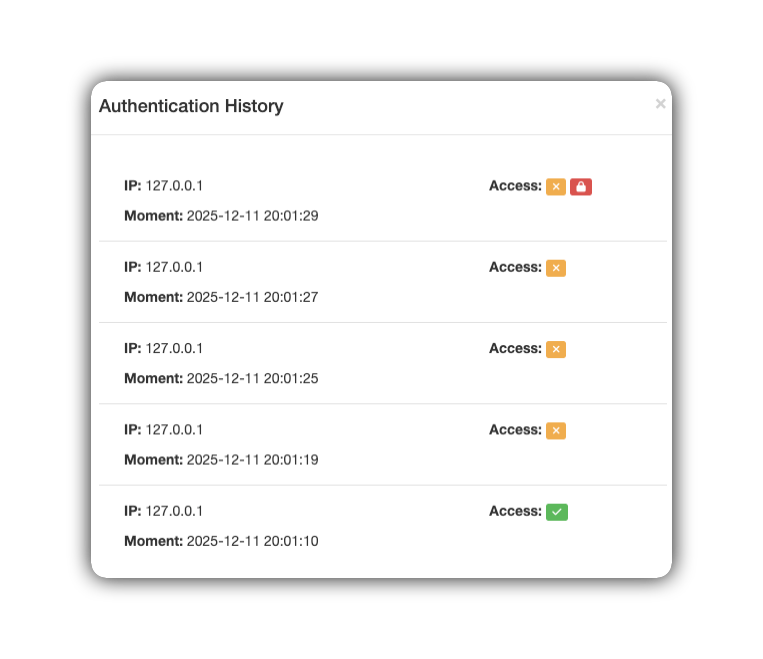
Authentication History
To ensure transparency and control, all access attempts (successful or invalid) are logged and can be viewed in the Authentication History.
The system monitors and stores detailed information for each user login attempt:
-
Source IP: The network address from which the request originated.
-
Moment: The exact time of the action.
-
Access: Whether access was allowed, denied, or blocked.
Legend of Access Icons
🟩 Green padlock/checkmark: Indicates success. The user provided the correct credentials and the login was authorized. It also indicates that the source IP was unblocked.
🟧 Orange "X" icon: Indicates the number of invalid attempts.
🟥 Red padlock: Indicates the blocking of the source IP.
Automatic Blocking
Neptune has an active security system designed to protect your application against attacks and unauthorized access.
When suspicious activity is detected, such as multiple consecutive attempts at an invalid login, the system automatically blocks the originating IP address.
Once blocked, the IP will not be able to make new requests for a specified period or until the block is manually removed.
Configure Blocking Rules
This rule is defined in the configuration files of your application environment, either "development.json" or "production.json".
1. Locate the configuration file
In the root of your project, navigate to the config folder. Open the file corresponding to the environment you want to protect:
-
For development:
_development.json -
For production:
_production.json
2. Insert the protection code
Within the JSON file, locate the section auth block. If it doesn't exist, insert the attempts block as in the example below:
{
 ...
 "auth": {
     "attempts": {
        "interval": 60,
        "maxFails": 3
     }
    }
}
3. Understanding the parameters
-
interval: Time window in minutes (example: 60 minutes = 1 hour). -
maxFails: Maximum number of failures allowed within this interval before blocking.
4. System behavior
-
After automatic blocking, the user is prevented from accessing the application.
-
By default, the system is configured for three invalid attempts with a one-hour block. After this period, attempts are allowed again.
-
This process can be configured according to the needs of your application.
Unlocking via Interface
Only a user with "Administrator" permission can grant access directly through the Back-Office without needing to access the database.
- Access the application menu in "View" mode, and click on the "Configuration > Users" section.
- In the "Edit existing user" field, select the desired user.
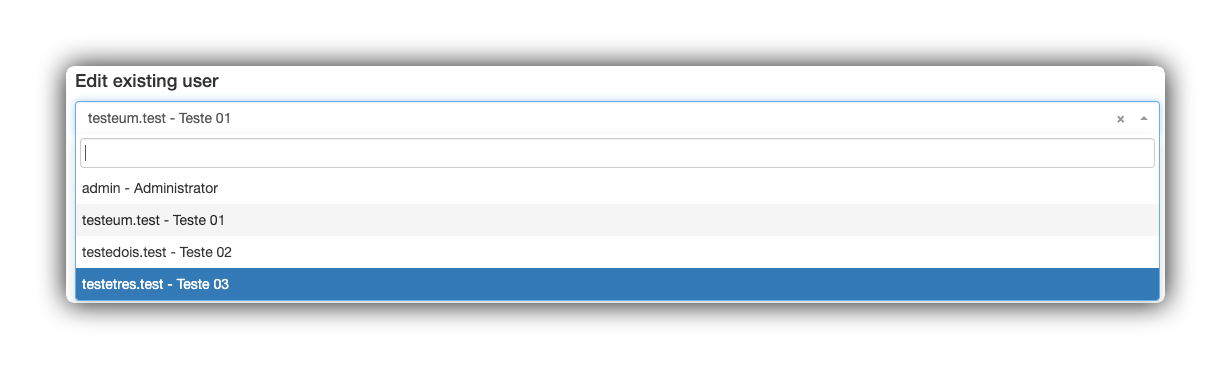
- In the "Authentication History" section, verify that the "Access" status displays the green "Padlock" icon;

- Click the Clock icon to view the user's complete login history.
- Click the green padlock in the "Access" column to unlock the user. After this action, a success message will be displayed.
The unlocking is immediate, allowing the user to try logging in again.
Integrated Authentications
Your application may require more sophisticated login methods, especially if you are building a mobile application or integrating with a corporate network.
Netuno is designed to be flexible and integrate into your organization's ecosystem. In addition to standard login (username and password), the platform supports various market authentication protocols.
This allows you to implement Single Sign-On strategies, where users access the system using credentials they already possess, centralizing access management.
Corporate Environments: Compatibility with user directories (such as LDAP and Active Directory), ideal for intranets and internal systems.
Social Login (OAuth): Possibility of integration with providers such as Google, Microsoft, GitHub, among others, facilitating registration and access in public applications.
Token Authentication (JWT)
For projects using a dedicated front-end (such as React, Vue.js websites or mobile applications), the traditional Netuno login screen is not used. In these scenarios, the JWT (JSON Web Token) standard is adopted.
Netuno offers a native service that automatically generates and validates these tokens, ensuring security and efficiency in API communication.
For more information on how to implement and configure JWT in your configuration files, see JWT Authentication Guide
Conclusion
Mastering Netuno's security features is fundamental to the health of your project. By correctly using user management, group management, and history monitoring tools, you have built an environment that balances data protection with ease of use.
This ensures your system on Netuno is:
-
Secure: Protecting sensitive information against unauthorized access.
-
Organized: Establishing clear hierarchies and responsibilities.
-
Scalable: Ready to grow with modern integrations.
Maintain best practices: Periodically review group permissions and check access history to keep your environment healthy.