Project Setup with IntelliJ IDEA
Pre-requisites
In this example, we are going to use IDE IntelliJ IDEA Community Edition. At this link, the Community version can be found further down, right after the Ultimate version.
You can use other Java IDE as an alternative to IntelliJ IDEA, Eclipse or NetBeans for example, you just need to make a similar configuration.
Install Netuno platform - your Java project will be integrated with the pre-installed Netuno platform.
Create Project
Right after opening IntelliJ IDEA Community, create a new project: click on the New Project button.
Choose the Java option on the left side. In the project name field (Name:) we are going to use Calc in our example.
Choose were the project will be located in your files under Location.
And the Build system: should be set to IntelliJ.
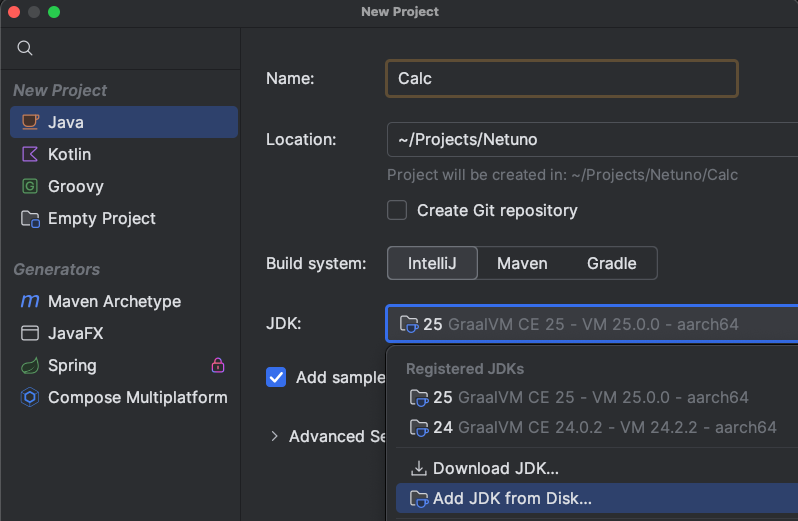
On JDK: we must choose GraalVM, which comes with Netuno. Choose the option
Add JDK from Disk..., and navigate to the directory where the Netuno platform is installed in your disk, then choose this folder:
netuno/core/graalvm
This is GraalVM's JDK, which we recommend using in your project to ensure we can run and debug the project.
Project Configurations
In the project files shown on the left, right-click the first one that displays the project name—in this case, Calc—to open the options menu, and go to Open Module Settings.
The window that opens should be on the Modules option on the left side, with three tabs on the right side:
- Sources
- Paths
- Dependencies
Paths
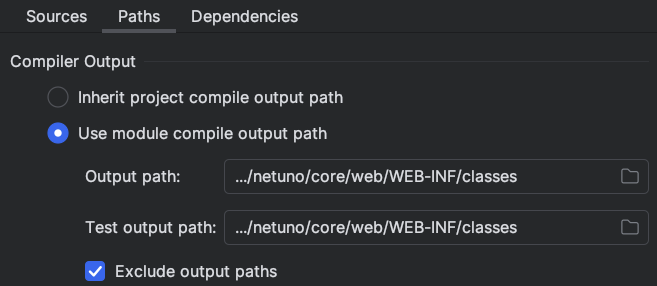
In the Paths tab, under Compiler Output, we are going to choose the second option:
Use module compile output path
And we are going to choose the netuno/core/web/WEB-INF/classes folder located in the installed Netuno platform folder. Both the Output path: and Test output path: options must have this exact same path.
The
classesfolder innetuno/core/web/WEB-INFmust be created since it does not exist by default.
Dependencies
In the Dependencies tab, click the + button located above the list panel.
From the options that appear, click the first option, which is 1 Jars or Directories...
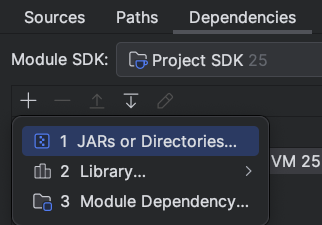
netuno/netuno.jar— located in the root of the platform.netuno/core/lib— select and add all files.netuno/core/web/WEB-INF/lib— select and add all files.
If a window appears displaying Detected Roots and Choose Roots, uncheck all selected options and click OK.
Verify in the file list that every JAR from the first to the last has been added. Attempting to select all files using keyboard shortcuts may not work properly; you should select the first JAR, scroll down, and hold the Shift key while clicking the last JAR. This method ensures that IntelliJ loads all of them correctly.
Make absolutely sure that all dependencies are correctly added, verifying that the first and the last JAR of each folder are present in the list.
With this, the entire Netuno ecosystem for Java is fully linked to your project.
Artifacts
This is where we can generate our project's JAR file, which facilitates code distribution to other Netuno instances running on different computers.
In the Artifacts option available on the left menu of the window presented in Open Module Settings, click the + button, then select the JAR option, and finally click Empty.
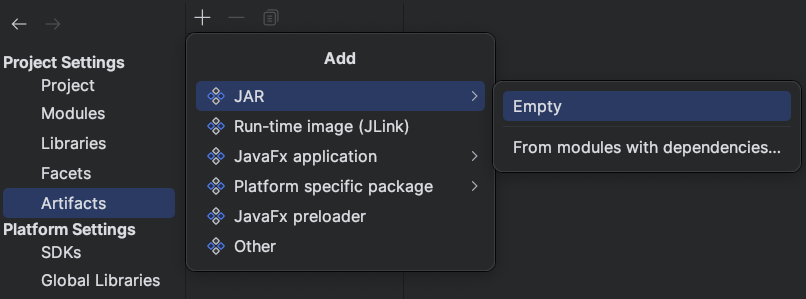
In the Name: field, enter the project name—for example, calc.
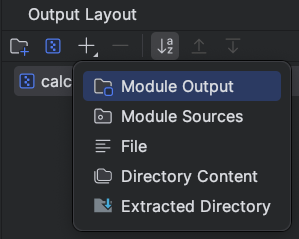
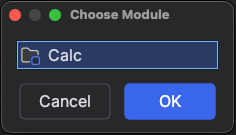
Right below in the Output Layout, click the + button, choose the Module Output option, select our project in the options window that appears, and click OK.
Click Apply or OK to close the project settings window.
Build the Artifact
To build the artifact, simply go to the IntelliJ global menu and select Build > Build Artifacts....
Choose the option for the respective project and click Build.
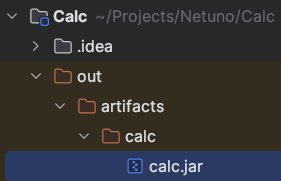
The generated file will appear in the project files list on the left, inside the out folder. In this example, it will be:
out/artifacts/calc/calc.jar
Publish the Artifact
The created JAR file can be distributed and deployed to any other Netuno platform instance.
However, the specific instance being used for development must not contain this project JAR, because the code is already published to:
netuno/core/web/WEB-INF/classes
Therefore, the JAR file is only intended for other platform instances that are not used for development and do not have the classes available.
On any installed Netuno platform, this JAR must be placed in the lib folder at the Netuno root directory:
netuno/lib
Note that this folder does not exist by default, so it may be necessary to create it.
All JARs located in this folder are automatically loaded by the Netuno platform.
Code Package
As is standard in Java, your code must always define a package.
Your package must be registered in Netuno's global configuration file:
netuno/config.js
Add the following code to the end of the file:
config.packagesScan.add("my.project.java")
If your package is not added to the configuration in this manner, your project will never be loaded.
This is because Netuno only scans for resources and services within packages that have been previously added.
An alternative to avoid registering the package in the configuration is to use Java packages that begin with org.netuno.
Netuno automatically searches for resources and services residing in packages that start with org.netuno.
It is recommended to use the prefix:
org.netuno.addon
For example, you can use: org.netuno.addon.calc
The org.netuno.addon package prefix explicitly distinguishes that it is an externally added feature rather than a built-in part of Netuno itself.
Consequently, all your Java code that integrates with Netuno should be defined and structured under:
org.netuno.addon.my.project
Append your specific project identifier after the org.netuno.addon prefix.
Execution
To run the project, a new run configuration must be created.
On the top toolbar, there are buttons for Run and Debug.

Click the option that says Current File with the downward arrow symbol, located just before the execution arrow button.
Next, click on Edit configurations....
In the window that opens, click the + button in the top left corner and choose the Application option.
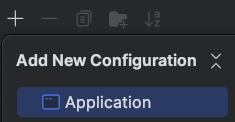
In the Name: field, enter Netuno, and in the Main class field, enter org.netuno.cli.Main.
In the Program arguments field, fill in the Netuno server startup instruction with an application. In this example, an application was previously created, which is also named calc:
server app=calc
The app must be created beforehand; inside Netuno, use the command:
./netuno app
Set the Working directory: field to the Netuno root folder. It is crucial that this contains the complete, absolute path.
It should look like this:
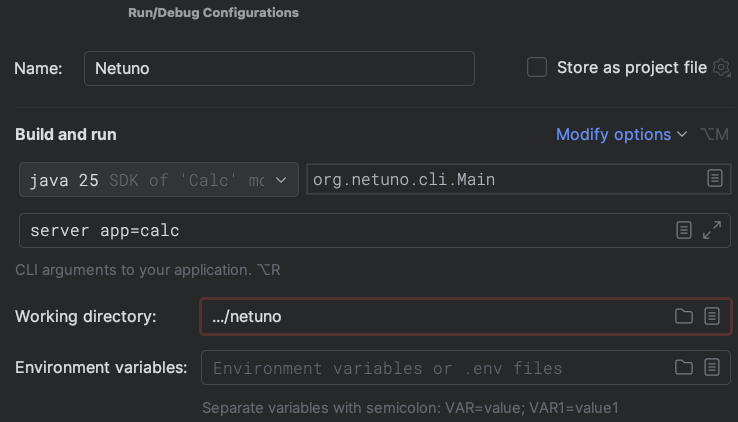
Now simply click Apply and OK.
With this setup complete, you can run the project or perform debugging.

Conclusion
We have seen how to create a new Java project to add new behaviors to the Netuno core.
We also covered the best practices for generating the JAR file and distributing it within the netuno/lib folder.
All Java programming techniques and libraries can be utilized to create any type of functionality within Netuno.
This is particularly useful for creating low-code programming resources that become available to all supported scripting languages, such as:
- JavaScript
- Python
- Ruby
- Kotlin
- Groovy
In the following tutorials, learn how to create your first low-code programming resource.
You will also learn how to create your first multi-application web service, available across all applications configured in Netuno.